Do you have a super strong urge to eat a plate of steaming and aromatic biryani, only to realize that a huge amount of time is required to make one?
The many items on the list, the infinite number of processes, the fear that everything is going to fail. I understand, I’ve been through that! Biryani sounds like a meal that requires a degree in cookery, doesn’t it?
Well, what if I told you there’s a secret?
How to get all those delicious flavors without the mess? This is not a mere recipe; it is a quick and easy chicken biryani recipe for beginners, a foolproof way to enjoy authentic flavor without stress.
This chicken biryani recipe is quite literally the best thing that ever happened to biryani loving people who do not want to spend an entire day in the kitchen. I make it whenever I crave a good meal but don’t feel like working hard in the kitchen.
I’ve even succeeded in getting a die-hard biryani hater to like this recipe, my own brother! He used to wrinkle his nose at biryani; he hated its strong taste and the fried onions. I’ll tell you in the common biryani mistakes and how to fix them section why over frying onions can actually make biryani bitter. However, when I unveiled this simple aromatic one, his eyes lit up. He even inquired about second servings!
Now that is what I call a win. You can trust me, you can make this wonderful and beginner friendly biryani recipe within an hour, and you can be a legend in your kitchen.

What is the true origin of biryani?
The exact origin of biryani is debated, but most historians agree that it was introduced to South Asia through Persian and Mughal influences. Some believe the Mughals refined it in their royal kitchens, blending Persian polao with local South Asian spices. Others suggest that Arab traders brought early versions of the dish to the Malabar coast in South India.
Over time, biryani developed countless regional variations; from the fragrant Hyderabadi dum biryani to the potato-rich Kolkata biryani, to authentic Pakistani chicken biryani enjoyed worldwide. What remains constant is its royal heritage and celebratory status. So, when you prepare biryani at home, you’re recreating a dish that has traveled across empires, cultures, and centuries.
Your Chicken Biryani Recipe: Master a Simple Method
Let’s be real, the best recipes break things down into simple, manageable steps. That’s exactly what we’re doing here. We’ll build our biryani in three magical layers: the perfect rice, the flavorful chicken, and the final assembly that brings it all together. This approach will help you to remain calm, cool, and collected while you cook.

No. 1 Quick & Easy Chicken Biryani Recipe for Beginners
Ingredients
Equipment
Method
- Ever afraid to go forth and make biryani at home?How to prepare chicken biryani which can be compared to the one served in a five-star restaurant? It is in the details, and I will take you through each and every detail. Now the chicken biryani recipe with curd is going to be your new party trick. Interesting collage of photos taken step by step of the preparation process, including soaking the rice or mixing the marinade.
- First of all, soak your 2 cups Basmati rice at least one hour. This is essential to those long fluffy grains!
- Now, prepare that marinade. In a bowl, blend the yogurt with all your spices. This marinating chicken biryani is the actual hero of the dish it makes the chicken so juicy and tasty.
- Chop your potatoes, peel and slice your onions and prepare your ginger and garlic pastes. A bit of preparation saves a lot of hassles!
- Heat some oil in a large pan.
- Fry the onions until they turn golden and soft. When they are to perfection, add your ginger and garlic pastes. Stir around a minute until you can really smell them and then add the tomato paste.
- Let it simmer until the oil separates, that only then do you know the flavors are mixing wonderfully!
- Add the chicken and cook in it a few minutes. Add that superb yogurt marinade and stir. Cook together all on medium heat until the chicken is tender and the sauce thick and fragrant.
- In another frying pan, add more oil and fry your potatoes until they are golden. What is the biggest pitfall here? Not allowing your oil to QUITE hot! Your potatoes will simply become moist Be patient!
- Put out a large pot of water to boil with all those beautiful whole spices, salt and oil.
- Take your wet rice and add to the boiling water. Cook till it is approximately 90% cooked. It must be somewhat sharp.
- Which rice is the best one to make biryani? You are right, it’s always aged Basmati rice for biryani, giving you long, separate grains.
- Squeeze all the water out of the rice and put it aside.
- Get a wide and large pot.
- Put a little layer of rice on the bottom. Then, top it with your chicken and fried potatoes.
- Then additional layer of rice, more chicken and potatoes.
- Finish by adding a top layer of rice.
- Simple, isn’t it? Feels almost effortless, right?
- Sprinkle some of that lovely food dye on top. This adds to it the traditional biryani appearance!
- Place your lemon slices, eggs and chopped coriander on top. And of course, dried plums to add a zing!
- Cover the pot with a lid (or foil) and place it on very low heat and leave it 10-15 minutes. This is the magic part; the flavors get to know one another.
- What is the indication that it is ready? The aroma! It will take over your entire kitchen and make your mouth water.
- This is the trick of a perfect dum biryani at home for beginners. The low and slow steaming method creates restaurant-quality flavor.
My Biryani Secret
Here’s a little secret that makes my biryani stand out. Most people either cook the potatoes directly in the chicken gravy or boil them before adding them in. But I do it differently, and it’s a trick I learned from my khala! I fry the potatoes separately until they turn golden and crisp; and only add them when it’s time to put the biryani on dum. This way, the potatoes soak up all the steam and flavors at the final stage, making them melt in your mouth soft inside yet rich and flavorful on the outside. Trust me, this simple trick takes the whole biryani experience to the next level.
And of course, don’t forget the garnish, a handful of fresh coriander lifts the whole biryani. If you’re like me and often find your coriander wilted or even rotted in the fridge, I’ve shared a quick coriander hack to always keep it fresh.
Common Biryani Mistakes and How to Fix Them
Even professionals can have a bad day! These are some of the most common biryani mistakes and how you can avoid them. With these quick fixes, your biryani will stay beginner friendly and delicious.
Gooey Rice?
You likely cooked it too long before you layered it. 90% cooked is the aim!
Dried Chicken?
The marinade is important, so don’t omit it. Your secret to juicy, tender chicken is that curd chicken biryani recipe.
Messy pot after layering?
Never stir after layering! Just steam gently. This keeps the long Basmati grains intact and picture perfect.
Too Much Food Color
Always dilute just a few drops of yellow/orange food color in milk or water before sprinkling. It gives a natural look without altering taste.
Over-Fried Onions
Fry onions only until golden brown. If you brown the onions too much before adding spices, it will make your biryani bitter.
Pro Tips for Cooking the Perfect Chicken Biryani
Here are some biryani tips that helps you to cook biryani perfectly.
- Marinate Properly: Always marinate chicken with curd and spices for at least 30 minutes (overnight gives best results).
- Perfect Spice Balance: Adjust chili levels add more green chilies
- for extra heat or reduce red chili powder for a milder taste.
- Use Quality Rice: Aged basmati rice gives the best aroma and long, separate grains.
- Don’t Overcook the Rice: Cook rice only 90% before layering; it finishes cooking on dum.
- Seal the Pot (Dum Technique): If the water dries up and rice is still undercooked, wet a clean cloth, wrap it around the lid, and cover the pot again. This locks in steam and cooks the rice perfectly.
- Serve It Right: Use a flat spatula to gently lift and serve layers without breaking the rice grains.
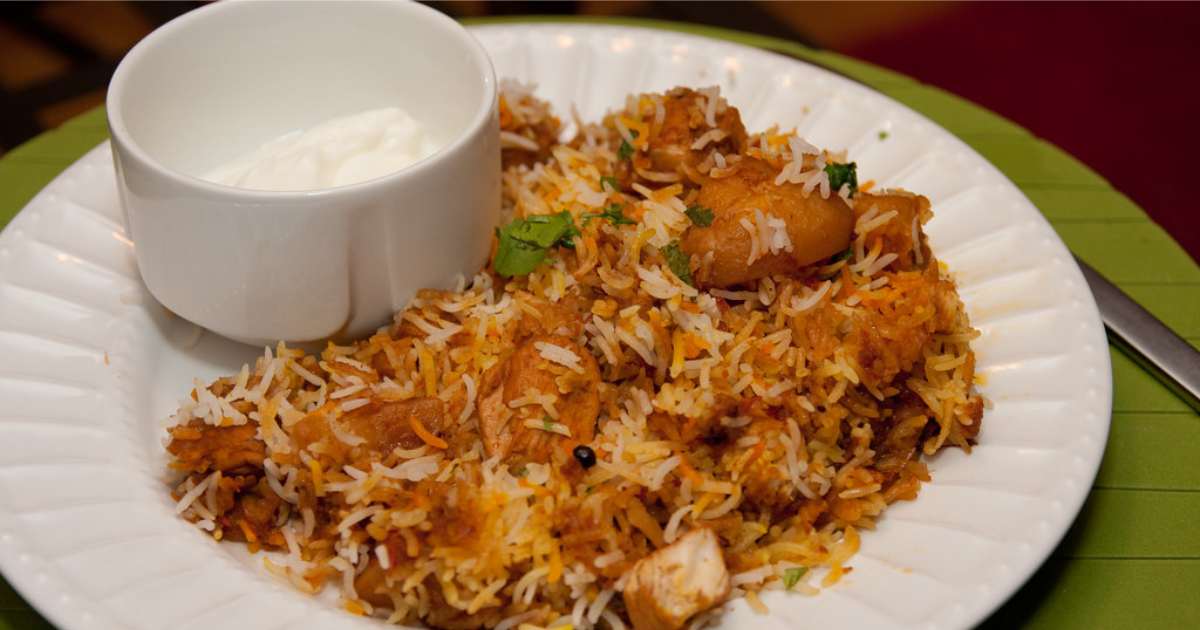
- Pair It Well: Serve hot with cucumber-onion raita or a fresh green salad.

The Final Touch: Easy Chicken Biryani Recipe for Beginners
- This 3-layer easy chicken biryani recipe is perfect for beginners and busy people who want a quick, flavorful meal ready in no time.
- This recipe offers big flavor with minimal effort whether you are a culinary novice or only interested in a low stress dinner.
- I can’t wait for you to try this biryani! I’m sure you’ll become a biryani for life fan. Share your creations by tagging me in photos or videos. I’d love to see your delicious results!
Frequently Asked Questions (FAQ)
Q. What is the difference between biryani and pulao?
A. The main difference is in the cooking method. In biryani, the rice and meat are cooked separately and then layered before steaming (dum), giving it rich flavor and texture. In pulao, the rice and meat cook together from the start, resulting in a simpler dish.
Q. Can I use boneless chicken in this chicken biryani recipe?
A. Yes! Boneless chicken works perfectly for this easy biryani recipe. Since it cooks faster than bone-in chicken, reduce the cooking time slightly to keep it juicy and tender.
Q. Can I make this biryani in a pressure cooker?
A. This recipe is best cooked in a stovetop pot to achieve the perfect biryani at home. A pressure cooker can make the rice mushy and affect the layered texture, so it’s not recommended.
Q. How do I prevent the rice from becoming sticky or gooey?
A. Cook the rice to 90% doneness before layering. Avoid stirring after layering, and use the dum technique (steaming with a tightly sealed lid) to keep the grains separate and fluffy.
Q. How long should I marinate the chicken for the best flavor?
A. Marinate the chicken for at least 30 minutes, but for maximum flavor, marinate overnight in the fridge. Proper marination ensures juicy, tender chicken in your perfect biryani at home.
Q. Can I make this biryani ahead of time?
A. Yes! Prepare the meat and partially cook the rice in advance. Assemble and steam the biryani just before serving to enjoy the freshest, most flavorful chicken biryani.
Q. Can I adjust the spice level in this easy biryani recipe?
A. Absolutely! Add extra green chilies for more heat or reduce red chili powder for a milder flavor. Adjusting spices lets you create a biryani that suits your taste perfectly.
Q. What side dishes go well with this chicken biryani recipe?
A. Pair your biryani with cucumber-onion raita, fresh green salad, or yogurt dips. These sides balance the rich flavors of the biryani and make for a complete meal.
Q. Can I use frozen chicken for this recipe?
A. Yes, but make sure it is fully thawed before marinating. Frozen chicken can release extra water, which may affect the rice texture.
Q. How should I store leftover biryani?
A. Store in an airtight container in the fridge for up to 2 days. Reheat gently on the stove or microwave to maintain the flavor and texture of your perfect biryani at home.
And in case you want any questions regarding servings or something like that, you can leave a comment below. I look forward to assisting you!
Beta, this recipe is just lovely! I’m so proud of you, my little girl. Keep going, you’re doing amazing.
MA SHA ALLAH ❤️
Thankyou Mama.
I’ll immediately clutch your rss feed as I can’t find your e-mail subscription hyperlink or e-newsletter service. Do you have any? Kindly allow me know so that I may just subscribe. Thanks.
Hey! Thanks so much for your interest.
I don’t have an email subscription or newsletter set up just yet, but it’s definitely something I’m planning to add soon. Once it’s live, I’ll make sure to share the link so you can easily subscribe and never miss an update!